What is it?In the previous write up we looked at how to create a hack to control your TV or Blu Ray player using the Energenie IR sensor. In this section we will focus on using the add on board to record the signals from a remote control and then transmit these signals back to a device. In this write up I am hacking a WooWee Robot to add control from the Raspberry Pi, Python, Twitter or even a webpage. I had a few errors when trying to create this file on the Raspberry Pi where I already had a working LIRC remote file. This hack was created using a new SD card image with no other software installed.
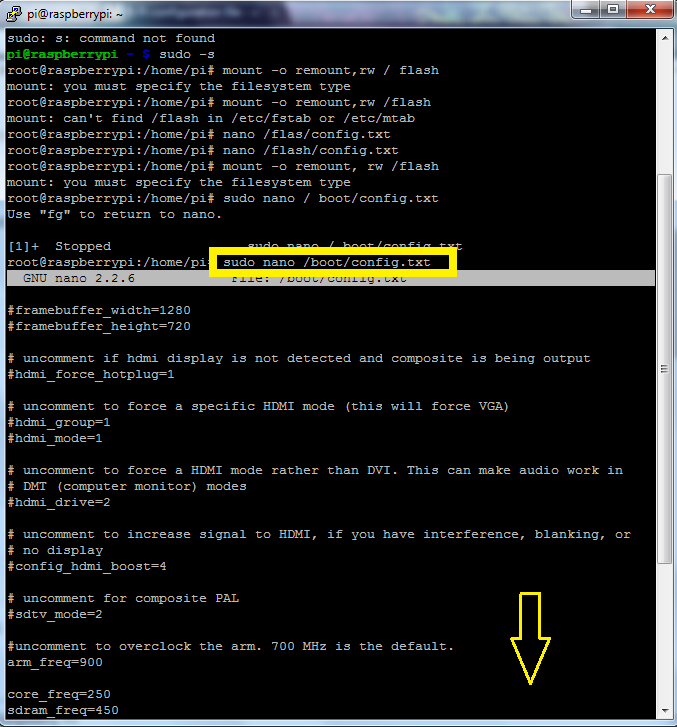
1. Getting StartedThis first part assumes that you have already set up you Energenie IR Remote. The first part is to add the boot text to the /boot/config.txt file
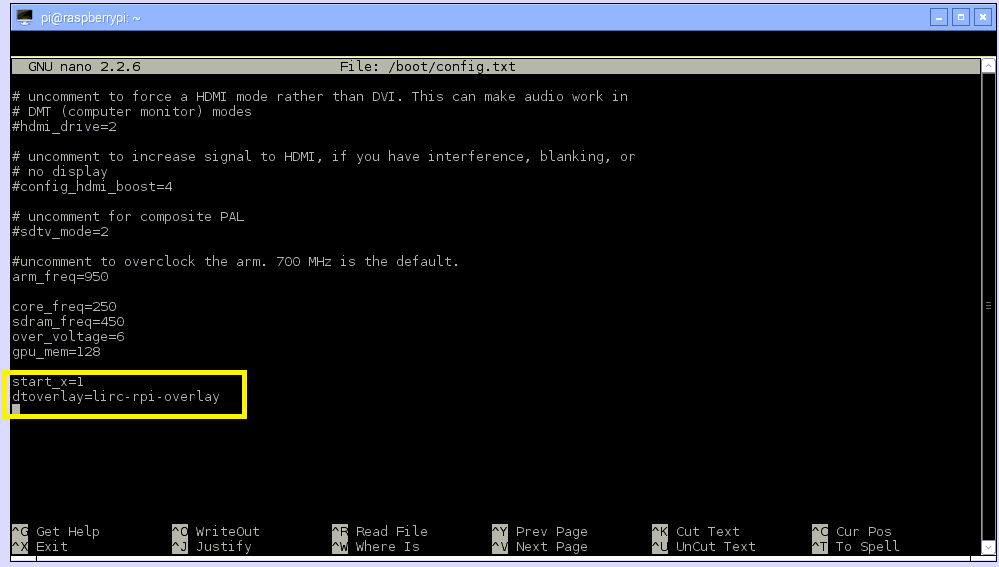
In the LX Terminal type: sudo apt-get update sudo apt-get upgrade The Pi2 requires a few changes to enable the IR software, type sudo nano /boot/config.txt This loads the config .txt file, add the following line dtoverlay=lirc-rpi-overlay
2. Configuring the Hardware FileThe next step is to alter the hardware.conf file. In the previous set up hack there were four changes to make, mine only required three. It may be a case that you have to play around with the settings to get the perfect configuration, starting with making one change, testing, then the next and so on. In the /etc/lirc/ folder there is a file call hardware.conf there are four changes to make here. To open the hardware file and edit it,
Open the LX Terminal, type: sudo nano /etc/lirc/hardware.conf Make the following changes: DRIVER = "default" DEVICE = "/dev/lirc0" MODULES = "lirc_rpi" Press Control X to save the file, don’t rename it, press Y and then return. Then you need to restart the lirc, type the code, sudo /etc/init.d/lirc restart. 3. Creating your own lirc file: Part 1
Now that the hardware is set up you can record the IR signals from the remote. This involves running a program called irrecord and pointing the remote at the IR board, then pressing loads of buttons! The signal will be recorded and then you can assign KEYS to each control.
Stop the LIRC software by typing in the LX Terminal: sudo /etc/init.d/lirc stop Then you have to create a new remote control configuration file (using /dev/lirc0) and save the output to ~/lircd.conf. Check that you have an lircd.conf file saved in the Pi/Home folder, in the LX Terminal type ls, you are looking for a file called lircd.conf. If there is no lircd.conf file, then create one by typing sudo nano lircd.conf, save the file with Control X and then type. Now you can create the new /etc/lirc/lircd.conf file with the irrecord application that comes with LIRC. In the LX Terminal type irrecord -d /dev/lirc0 ~/lircd.conf This will open the create program and will present you with a program and instruction on how to create and save the signals. There are two stages to this, the first part involves you repeatedly pressing the buttons on the remote until there are two line of dots on the screen. This is basically measuring and recording the signals being sent from the remote. 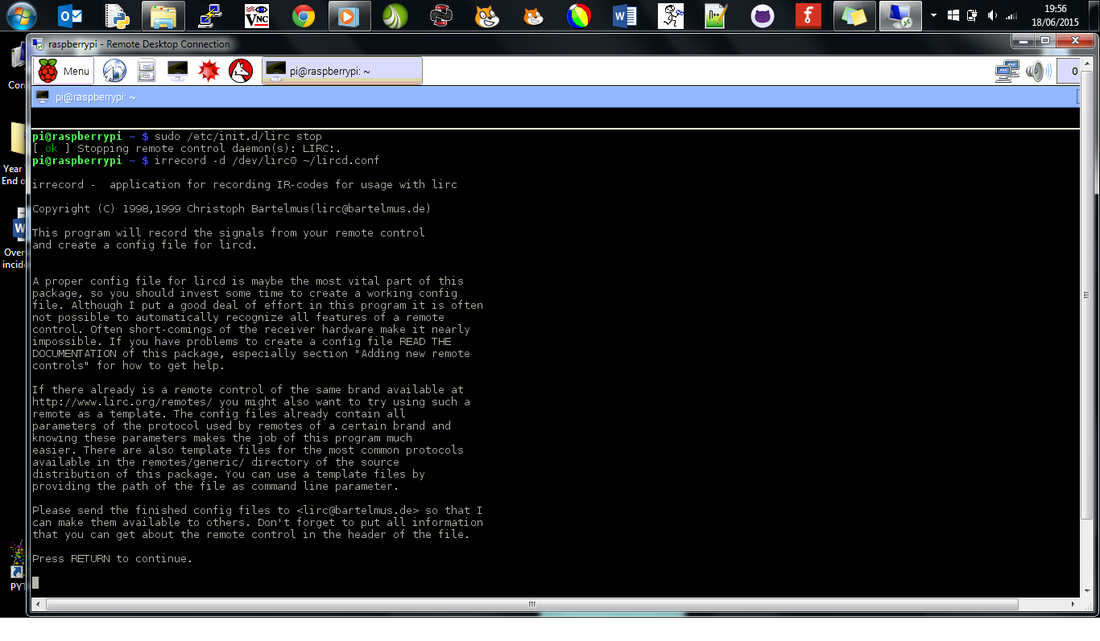
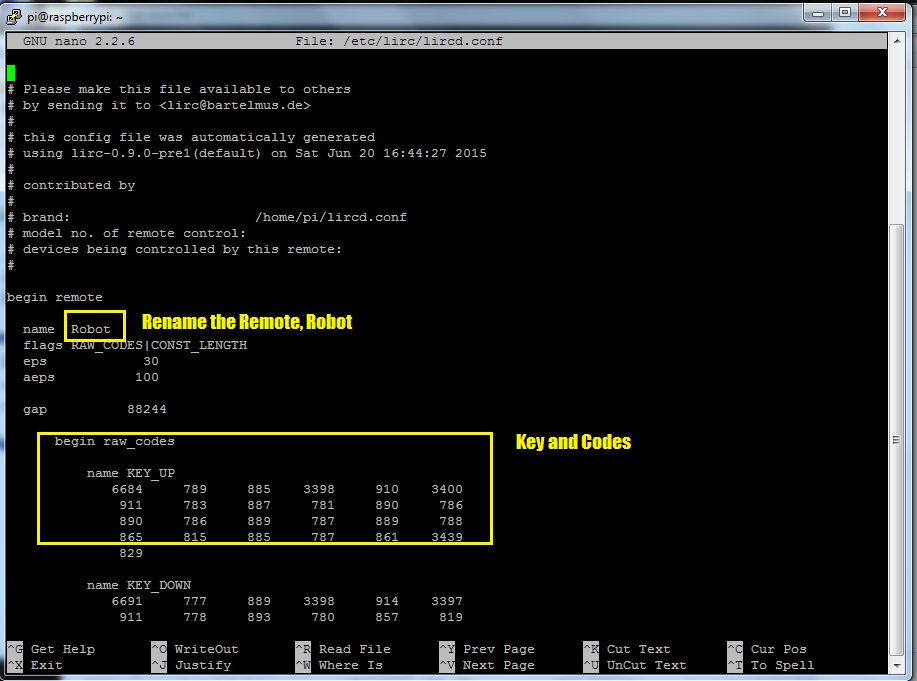
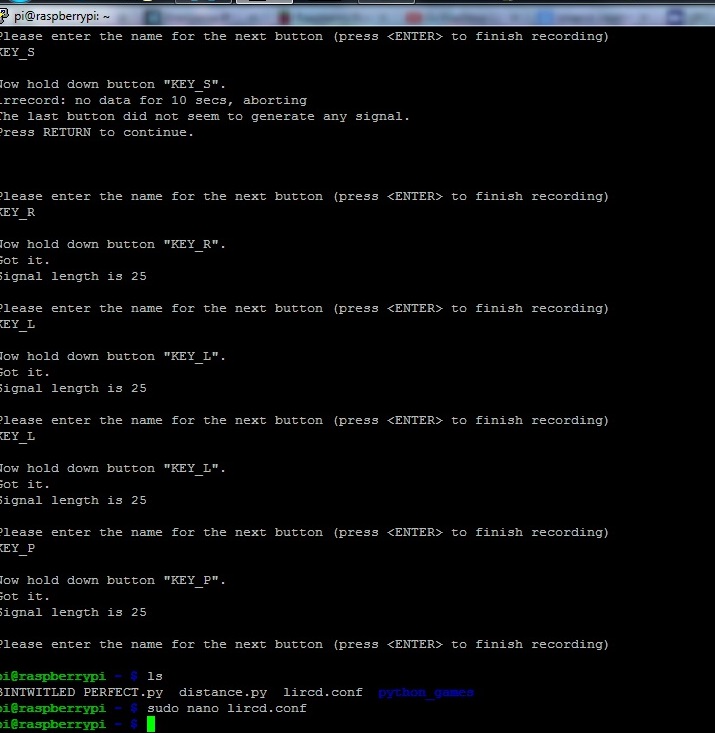
4. Creating your own lirc file: Part 2Once the remote has been recognised and the two lines of dots the program will then ask you to enter the names of the keys for each of the signals. You have to work through the elements on screen, type the name of each key for example KEY_UP and then press the corresponding key on the remote, the up key on the remote. You will then be prompted to type in the name of the next key for example, KEY_BACK, then press the back key on the remote and so on. Keep doing this until you have entered all the Keys and recorded them.
|
Robot Hack5. Transfering the FileOnce you have followed the program prompts and completed your custom LIRC file you then need to transfer this to the etc/lirc folder. There are two ways to do this. The simplest setup method is to copy over the code which you have just created into the lirc file. However, this will overwrite any old configuration setup that you have. (This is only an issue if you have already set up a previous configuration file. Step 6 will show you how to copy and save a new file.)
In the LX Terminal type, sudo nano /etc/lirc/lircd.conf When the file opens copy and paste over the code from the new lirc file which you just created. Press Control and X to save the file, do not change the name. Rename the "remote" name so that it is easier to refer to such as Robot. As you are required to restart the lirc, type the code, sudo /etc/init.d/lirc restart. If this works you can then test that the setup is correct by typing, irsend LIST Robot " " This will list all the KEYS that are installed in the lircd.conf file. If it has worked jump to step 7 to set up your controls to interact with the Robot.
6. Transfer the New File from the Command LineTo save copying and pasting you can use the command line to make a back up of the file and then transfer it to the required etc/lirc folder
Firstly make a backup of the original lircd.conf file In the LX Terminal type: sudo mv /etc/lirc/lircd.conf /etc/lirc/lircd_original.conf Copy over your new configuration file sudo cp ~/lircd.conf /etc/lirc/lircd.conf Start up lirc again sudo /etc/init.d/lirc start As before, you can test that the lircd file is working by testing that it lists the registered KEYS stored in the file, type, irsend LIST Robot " " This will list all the KEYS that are installed in the lircd.conf file. 7. Controlling the RobotOnce you have set up your remote's lirc file you are now ready to control your device, in this example my Robot. This will make use of the irsend application that comes with LIRC to send the commands. The commands are very simple, irsend SEND_ONCE Remote_Name Remote_Button. Use the irsend application that comes with LIRC to send commands. For example to make the robot walk forward you would type in the LX Terminal, irsend SEND_ONCE Robot KEY_UP
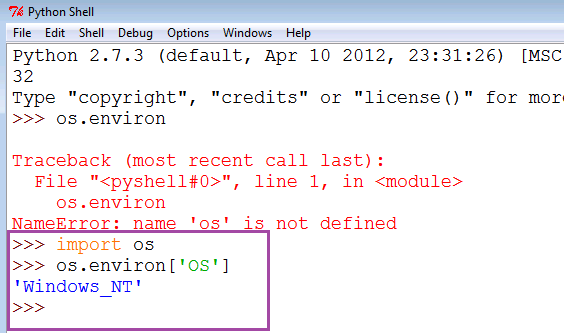
This will send the FORWARD IR signal and the robot will walk forward. 9. Python OSThe LIRC program offers you the facility to control IR via the command line, this is impractical for coding purposes as there are limited interactions with other hardware and algorithms. However, good old Python has an OS module which enables you to control the command line and execute command line instructions via a Python program. Using the code os.system("irsend SEND_ONCE Robot KEY_RIGHT") permits interaction between Python and the Raspberry Pi's Operating System. This code line will send the command to instruct the robot to walk to the right. You can read more about the OS commands and their functions here.
10. PyGameThe LIRC is now controllable through Python which means you could control it with Minecraft, via Twitter a PIR sensor. You can add keyboard controls to the Robot using PyGame, this allows you to use for example, the directional keys to move the robot forward, backward, left or right. Click here for a link to a great list f the keys that you can use and their naming conventions.
def runGame(): # Set a random start point. while True: # main game loop for event in pygame.event.get(): # event handling loop if event.type == QUIT: terminate() elif event.type == KEYDOWN: if event.key == K_RIGHT: print "left" os.system("irsend SEND_ONCE Robot KEY_RIGHT") elif event.key == K_LEFT: print "right" os.system("irsend SEND_ONCE Robot KEY_LEFT") 11. Makey MakeyNow that you can use Python to program and control the Robot you can interface with a number of other modules. You could attach a Makey Makey and use some spoons, and forks to control the robot. Use the Tweepy module to ebake the robot to tweet when evenr it hits

|
- Home
- Python
- Ras Pi
-
Pi Hardware
- Pi-Hacks
-
Pi-Hacks 2
- The Joker
- Hologram Machine
- Google Vision: Camera Tell
- Yoda Tweets
- Pi Phone
- Darth Beats
- Twitter Keyword Finder
- Crimbo Lights Hack
- Xmas Elf
- Halloween 2016
- Halloween Hack 2015
- Socrative Zombie
- Voice Translation
- The Blue-Who Finder
- GPIO, Twitter
- Pi Chat Bot >
- PiGlow & Email
- Pibrella Alarm System
- SMS with Python >
- Pi-Hacks 3
- Minecraft
- Computing
- Contact Me
- Random Hacks