What is it?Raspberry Pi Night Vision Camera
As a child I spent many hours playing ‘Splinter Cell’. I never enjoyed the classic ‘shoot em up’ style game so SC was perfect. A stealth game with a focus on creeping around in the shadows, where light and sound were used as tools to complete or hinder various missions. The iconic image from the game is the night vision goggles that Sam Fisher wears. I have always been fascinated by the idea that you can see in the dark and this formed the foundation of my idea to build a portable hand-held Night Vision piece of equipment. |
Night Vision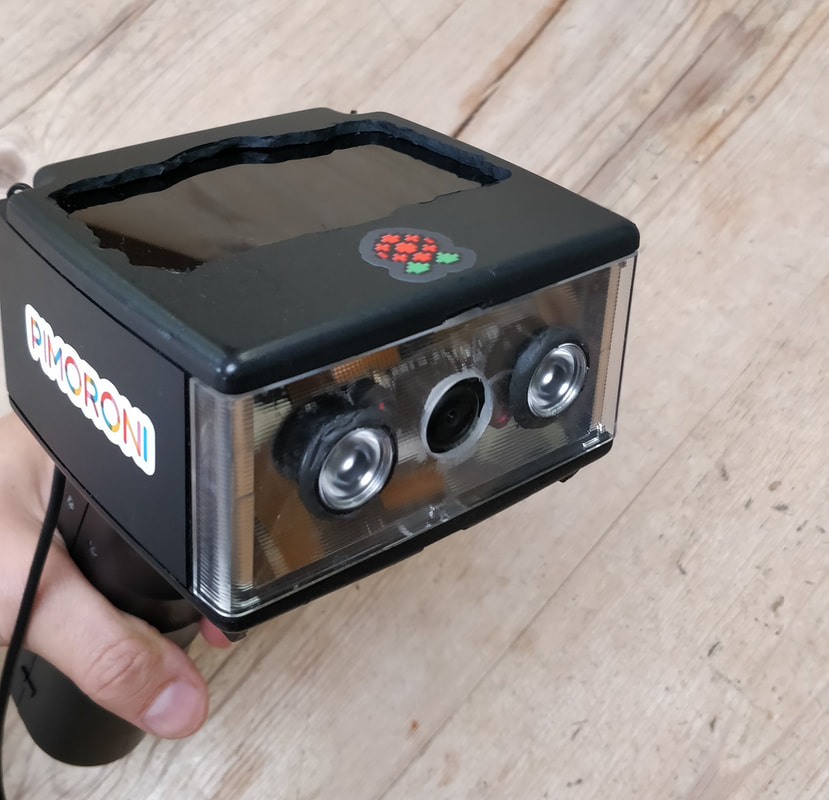
|
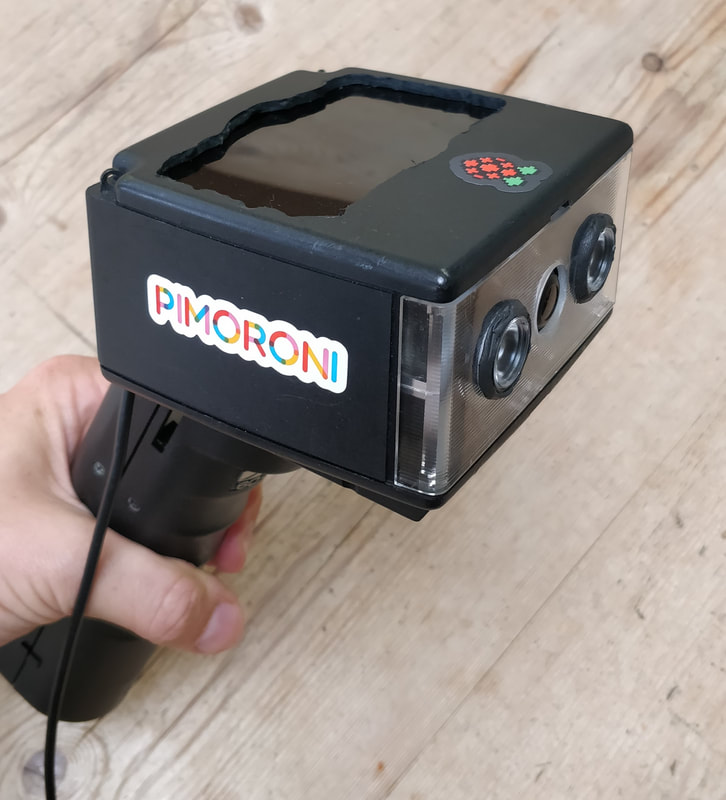
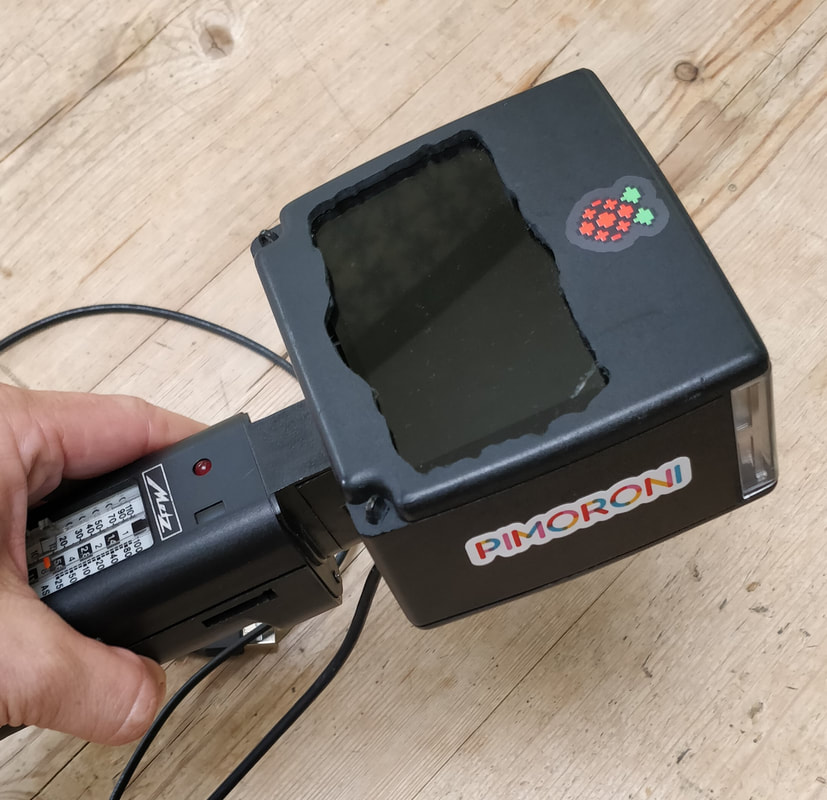
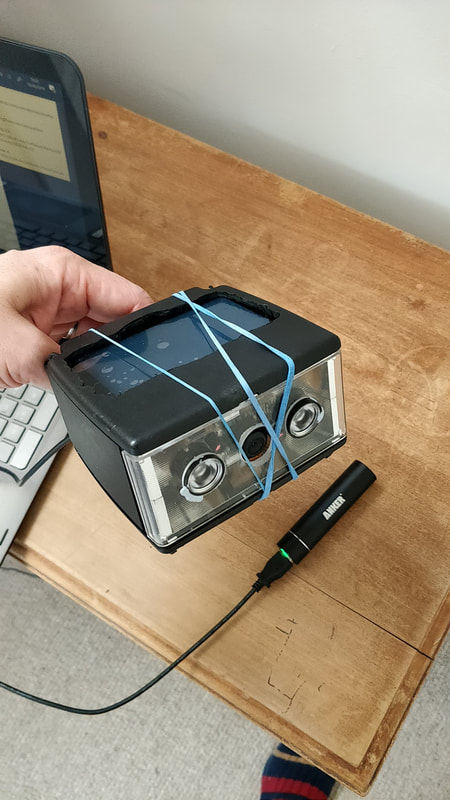
My completed Night Vision combines an IR camera (infrared, which enables you to take photos and videos in the dark) the Pimoroni Hyperpixel4 touch screen and a Raspberry Pi Zero W. I bought an old handheld camera flash from a car boot for 50p and this became the housing for the hardware. The Pi Zero is the perfect size as it sits inside the flash casing and still has enough room to support the HyperPixel screen and the original parts of the flash. The flash also has a tilting handle which means that you can angle the Night Vision and it is portable.
Building a Night Vision Device |
Features |
A note on screen rotation |
Software InstallThe Raspbian OS contains all the required software to use the camera straight away once it is connected up. The only other required install is the guizero, which is simple,
In the Terminal type, sudo pip3 install guizero More details about guizero, installing it and how to use it can be found here: https://lawsie.github.io/guizero/ |
At the time of building this project (August 2019) I was having issues with the HyperPixel4 screen. The screen needs to be rotated which is easy to do by editing the config.txt file. However, I found that the ‘touch’ accuracy was off by about 1 and 2 cms. I tried the new Buster OS but this still did not correct the issue. In the end I used an old version of the Raspbian OS which I downloaded from here: http://downloads.raspberrypi.org/raspbian/images/
Using GUI ZeroMost of the program code uses the PiCamera Python library to trigger the IR camera, to either, take a photo, record a video or display the preview. It is the preview that is used to display what is being seen in the dark and by extending the preview length you can specify the amount of time that the night vision is turned in for.
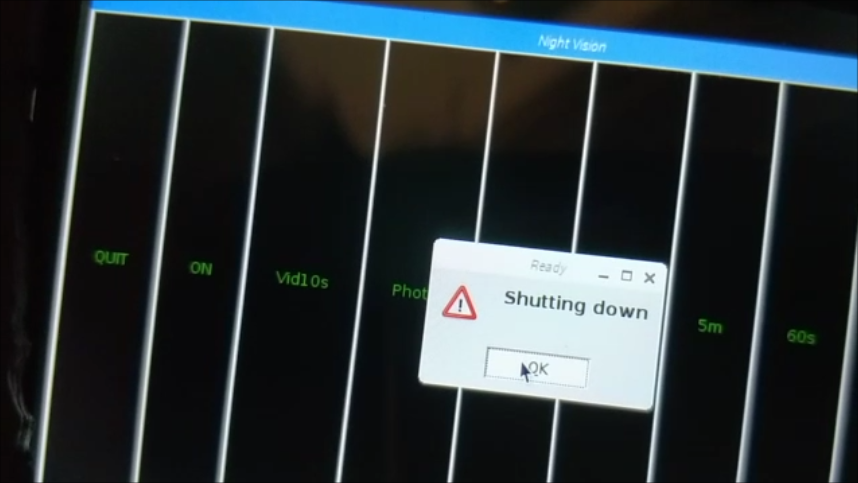
The program code consist of creating a function to control the camera preview, for example, display the preview for 10 seconds. def short_preview(): print("10 second preview") camera.start_preview() sleep(10) camera.stop_preview() The guizero is used to program a button which is displayed on the HyperPixel screen. When it is pressed it calls the function and runs it. P_10 = PushButton(app, text="10s", width = "fill", height = "fill", align = "right", command=short_preview) Shutdown the Night VisionThe program also makes use of gpiozero to combine the ‘shutdown’ function with the guizero ‘options’ feature, where you can create and display a window that provides the user with a choice. In this project the user can select to ‘shutdown’ or ‘cancel’ the shutdown of the Night Vision.
def shutdown(): #check_call(['sudo', 'poweroff']) close_down = app.yesno("SHUTDOWN", "Are you sure?") if close_down == True: app.warn("Ready", "Shutting down") sleep(3) check_call(['sudo', 'poweroff']) else: app.info("Shutdown", "Shutdown aborted") |
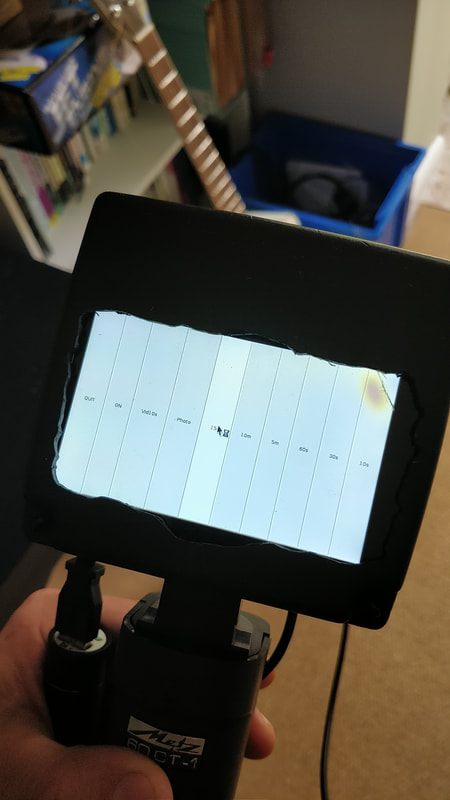
The GUIThe GUI consists of the following 10 buttons and features:
I changed the colour of the buttons to black and green as the original grey was too bright in the dark and distracted from the ‘stealth’ feel that I was trying to emulate |
FAILING (First Attempt in Learning)
One of the elements that I really enjoy when making a project are the problems that I encounter. The failings where you plan something but then you find you either need to do something different or the method you chose just will not work. Then you go on the hunt to find solutions. (Thank you to all who provided ideas, support and weblinks, @biglesp, @OldTechNewSpec, @Mr_MartinParker, @MolloyLaurence) Below is a quick rundown of some of the headaches that kept me awake thinking at night and how I solved them.
|
FAIL 1: Fitting the hardware into the flash casing was a pain and involved lots of dremeling, is that even a word? The smell of burning plastic was not pleasant and at times I was concerned about the fumes. Then I had to ensure that the original ‘plastic flash surround’ would still fit into the casing. It didn’t, so I had to Dremel out holes for the USB cables and the IR camera ribbon. This was stressful as the surround was weak, so if I cracked or split it, the project was over! In the end I dremeled the plastic away over a week, just a little bit each day
|
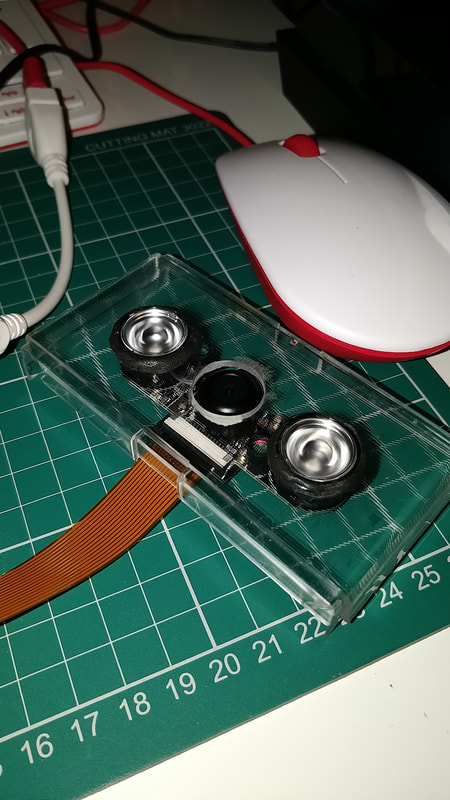
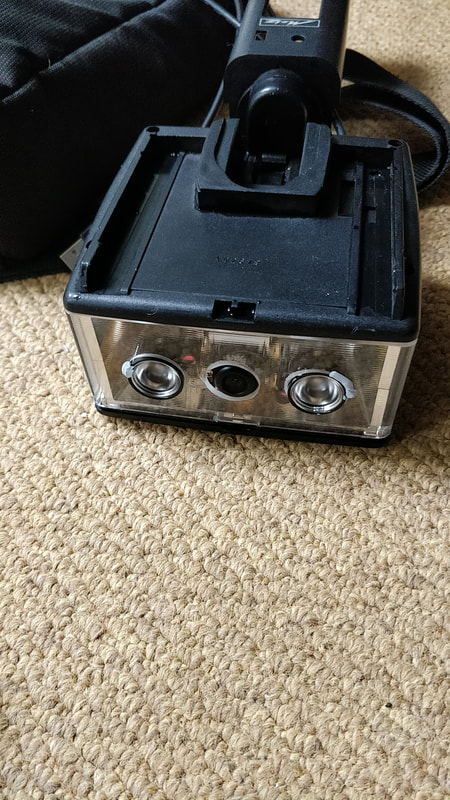
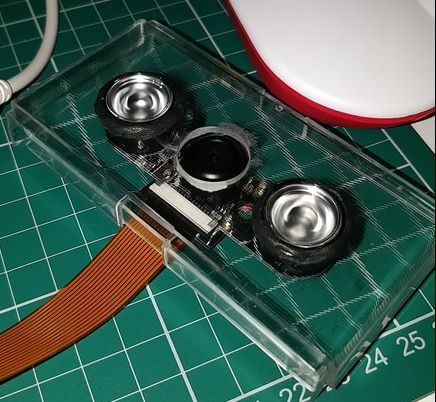
FAIL 2: Mounting the camera and IR sensors went well, I used some Sugra to hold the two IR LEDs in place, drilling two holes in the plastic which they slotted through. All was going well until I ran the program and realised that the camera image displayed back on the HyperPixel was upside down. Luckily at this point I was using elastic bands to hold the case and hardware together, so I could flip it around. BUT, the IR LEDs were secured in and breaking the Sugra might damage or split the plastic. As a stroke of fate, the IR LEDs are mounted into holders and guess what, you can pop the LEDs out of the holder. So, I popped them out and then rotated the camera unit and then popped it back into place!
|
|


|
FAIL 3: The Night Vision is stand-alone so I needed it to be portable and bootable, with minimum interaction from the user to get it running. The obvious solution was to use a crontab, but this did not load the GUI. One idea was to write a script that ran on boot up that triggered the Python program to run after 60 seconds. However, this did not work either, the script worked with a simple ‘hello world’ program, but the GUI would still not load. In the end I opted for a desktop icon which when you click it. The Python program runs and the GUI loads.
FAIL 4: Once I had tested every part of the project, I needed to fit it all together and then secure the screws back into place. As I did this. I had the screen flat on the desk and pushed a little too hard. The corner of the screen cracked!! The whole project was working and perfect so I was left with the conundrum of either replacing the screen and risking all the inner hardware not fitting back in. Or, just ‘make do and mend!’. I settled for the latter, so the 10 second button does not work, but if anyone would like to gift me a HyperPixel4 I will replace the cracked one.
Click to download the program code
|