You may already be aware that images are made up from lots of tiny dots called Pixels, picture element. These pixels can be various colours and combined to create an overall image. The higher the number of pixels the better the quality of the picture. I was interested in the concept that if a pixel is a single dot, could this dot be replaced by a Minecraft block and combined to build a picture within the Minecraft world. The answer is Yes, below are two simple methods.
1. Monochrome Bitmap RenderThe first code comes from WHALEY GEEK, check out his blog for more updates and Raspberry Pi codes. Getting started is simple, find a picture or logo that you want to render. Google image search tools can be used to apply filters such as colour, black and white and set a maximum or exact size of say 20 x20.
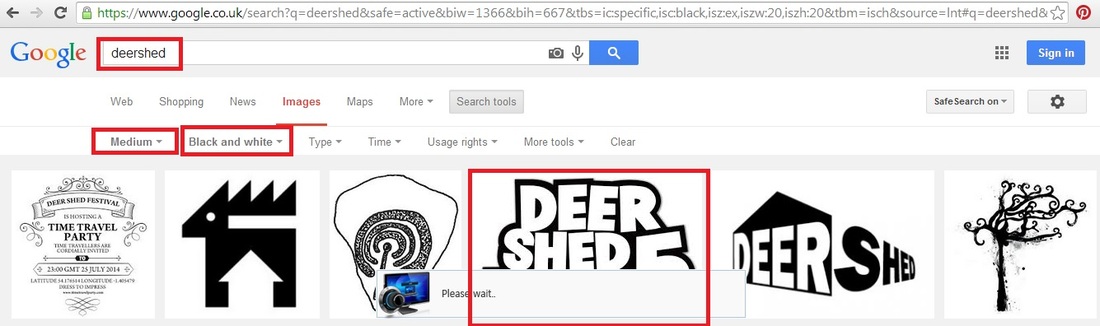
Google search settings
You can make the picture larger but currently the render distance of the image is low and as the player moves away from the final rendered blocks the image will begin to disappear. Don't worry if the picture you find is bigger as you can use an most image editing software even Paint to re-size and convert the picture to a monochrome bitmap.
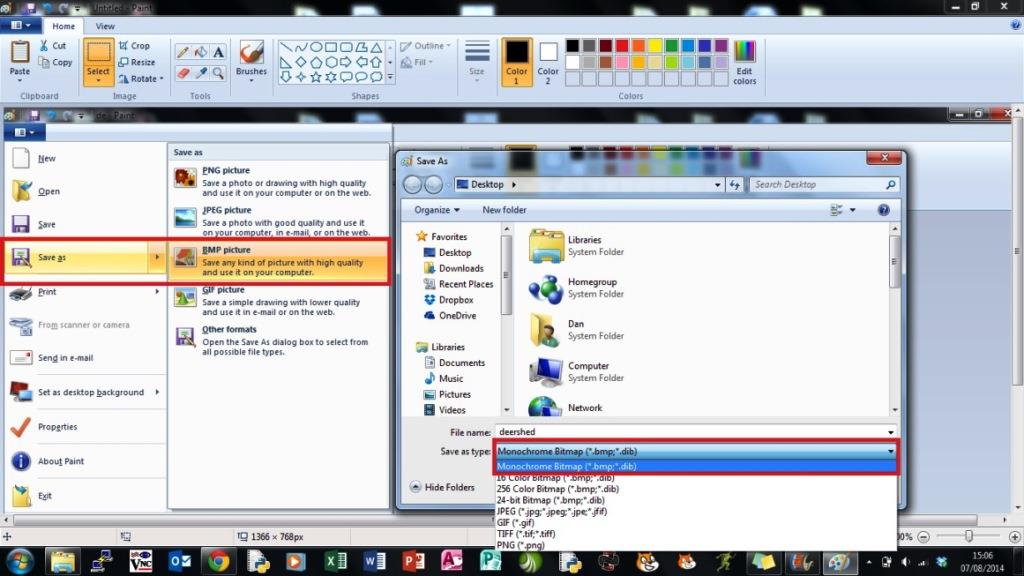
Once you have created an appropriate picture save it into the normal Pi / Home folder. Then download and save the render program at the bottom of this page and save this into the same folder. It is normal to save into the mcpi / api /python folder but I have used a system import to save the need for this. Open the LX Terminal and type sudo idle, this will open Python in super user mode. Start up Minecraft and begin a new game, when it has rendered the world, return to idle and open the bitmap render program, hit F5 to execute it. When prompted type the full name of the bitmap file, then the code will begin creating the bitmap from Minecraft blocks, look around nearby and find your logo!
It is also possible to change the two blocks that are used to represent the white and black. Each block is assigned a number which can be used in the program to build say a logo made of TNT which you can then blow up, although this will lag out your Pi! Or how about another strange combination like water and gold?
Code Download
|
2. JPEG RenderThis code works along a similar principle to the Monochrome code, it scans through the picture and identifies each pixels. This time however it identifies the colour of the pixel and then matches the colour to a suitable Minecraft block. It then places each block building up a coloured version of the image. The original code was created by FERRAN FABREGAS and is available at his blog.
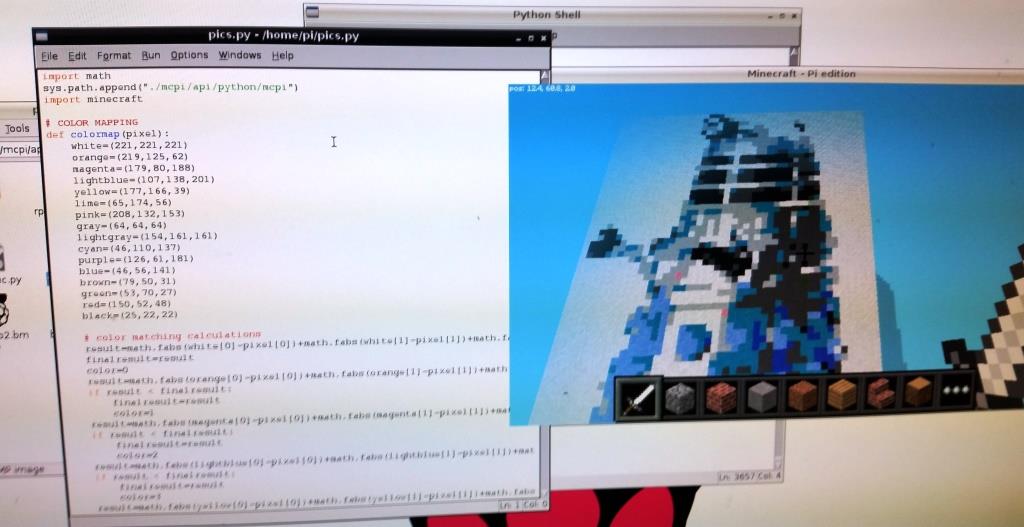
The program makes use of the Python Imaging Library (PIL) which needs installing first. It adds image processing capabilities to your Python code and supports many file formats and provides powerful image processing and graphics capabilities.
In the LX Terminal type: sudo apt-get install python-imaging sudo apt-get install python-imaging-tk Next create or find your JPEG image such as a photo or a picture of a cat. The program can render 200 x 200 pixels however, the render viewing distance in the Minecraft world is poor and you will not be able to view the complete image. I found that 100 x 100 is a more suitable size if you want to be able to view the whole image. Again most Photo Editing software enables you to resize an image to a particular pixel size. Then save your picture into the Pi / Home folder. Download the JPEG Render code from the bottom of the page and again save into the Pi Home folder. Then open the LX Terminal and type sudo idle, this will open Python in super user mode. Start up Minecraft and begin a new game, when it has built the world return to idle and open the JPEG Render program, hit F5 to execute it. When prompted type the full name of the JPEG file the code will begin creating the JPEG from a selection of appropriately coloured Minecraft blocks.
|


