|
I run a Raspberry Pi lunchtime club for students and they wanted to create a Star Wars hack. A local store was selling R2D2 sweet dispensers for a couple of pounds and I decided to purchase some and see what ideas the students came up with. This is the online account of their development of the R2D2 hack. Scroll to bottom for final project video.
The students original wanted to create an R2D2 that: 1. Prints out random Star Wars Facts - no screen used! 2. Flashes a red LED - to completed 3. Projects an image - too complicated 4. Randomly gives the user a little electric shock, just like R2D2 - simulated! 5. Takes a picture of the user - sends a web feed instead 6. Broadcasts a song / fact onto the radio - plays the Star Wars theme tune |

|
1. Random Fact Generator
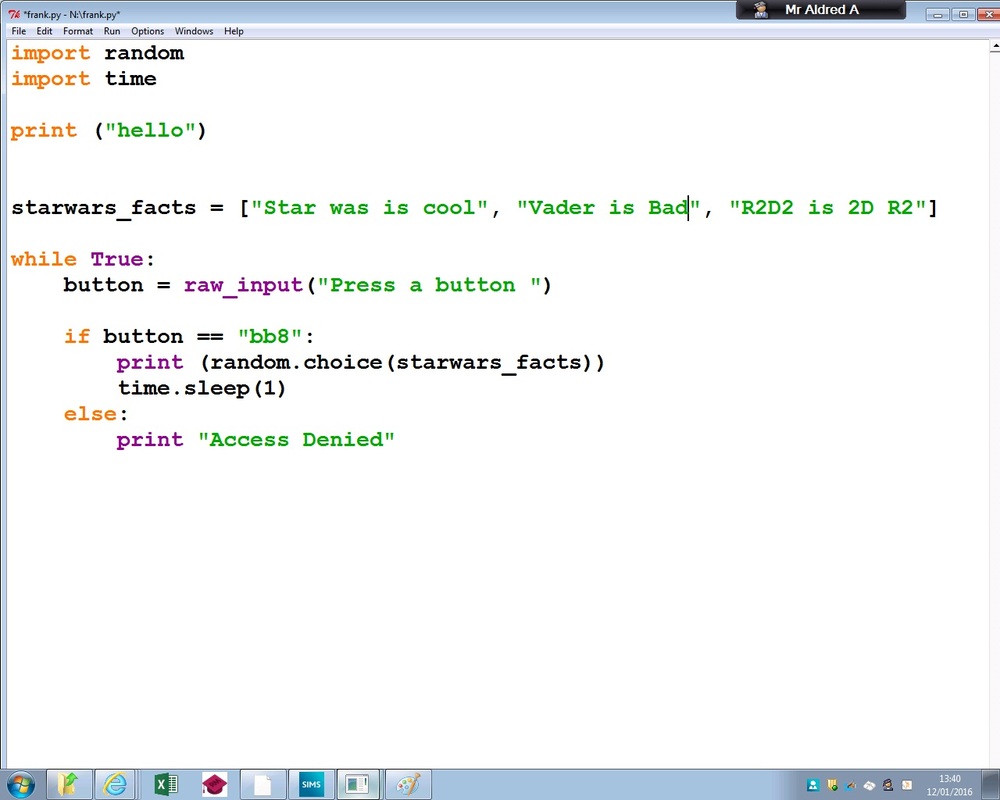
The first step was to create a simple random fact generator using random.choice. The facts will be downloaded from a website or written out by the students from their own knowledge.
|
2. Red LED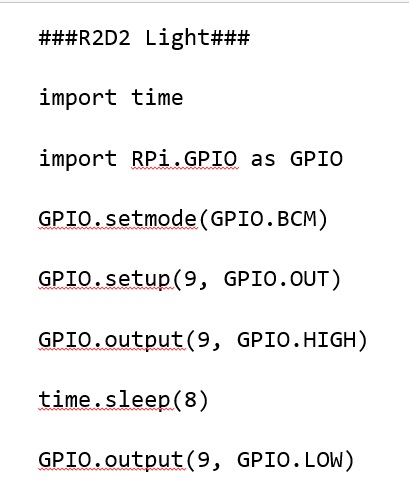
Next the students programmed the LED to turn on and off after a short delay. This used the GPIO pins BCM numbers, (pin 21 and 39 for the ground). The long leg of the LED is the + and connected to the 3.3v pin (GPIO 9)
|
3. Drill the Holes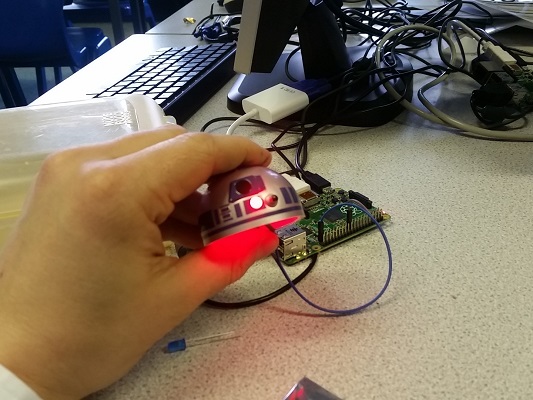
Using a drill a some delicate pressure we made a whole for the LED to fit through and used the code in step 2 to control it.
|
4. Web Cam Hack
Students wanted to be able to see from R2D2 what the user looked like, who had pressed the button. We hacked an old USB Web Cam, drilled a hole in R2's head to place it.
|
5. Motion

'Motion' enables you to easily set up a stream from the Web Cam which you can view from most browsers. type sudo ifconfig to find the RasPi IP address and then enter this into a browser. Lots of guides are out there: one link is here
|
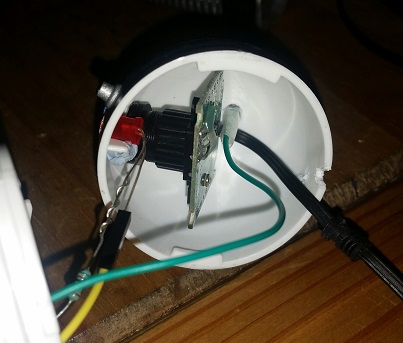
6.Getting the Button to work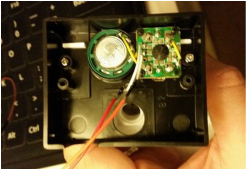
The R2D2 responds when the front button is pressed. This is the triggers the R2D2 bleeps. The wires were cut and two extension wires added. These were joined to the GPIO pins and a code used to check for a Pull Up - a small change in current.
|
7. GPIO Pull Up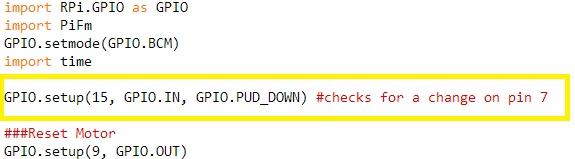
The GPIO Pull Up checks for a change in the state of the current, it basically registers a change and can be used to trigger an event. When the main R2D2 button is pressed the GPIO change is registered and then this triggers the code the enable the LED or a Haptic Motor to start.
|
8. Vibe Motor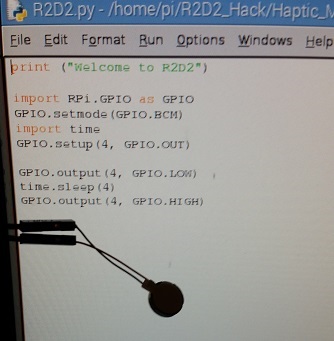
Despite the one students wish to enable R2D2 to electrocute people I felt it was not the best thing to do! Instead we settled on a Haptic Motor which could be used to vibrate the R2D2 case and may 'shock' the person who pressed the button.
|
9. PiFM

The students wanted to broadcast the facts over a Radio, this makes use of PiFM, which ironically has the Star Wars them install! It works on a single pin but testing is required to ensure that it works with all the other wires connected.
|
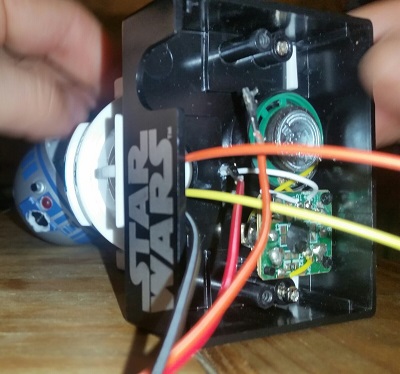
Wiring Up
|
|
Wiring up the components to the R2D2 and Raspberry Pi was fiddly and took some time. The droid is mounted on top of a black Pi case to hide the wires and enable the the USB and Ethernet ports to be used. This also makes it more robust. The webcam feed can be viewed on 192.168.1.12:9091
|