Project New York is the project name for a Wearable Social Media Glove. With the advent of Google Glass, Android and Apple Smart Watches and various other hacks it points toward a future where we will wear the gadgets that allow us to communicate with each other. (Before they are embedded into our bodies). The more natural or ergonomic this medium becomes then the more likely we are to use it. So take a Raspberry Pi, a few buttons, wires, GPIO pins and Python and here we go...... (development diary is shown below).
UPDATE 11 28.9.2014: Reading form a File.
The Glove now speaks and gives the wearer instructions and responds to your inputs. The train data is downloaded and stored in a CSV file but needs a little tidying up before it is usable. This is achieved by opening the file with, open("traintimes.csv") and then create a variable for example data = read_file.read(). I then created a list to store the train data and used train_time_list.split(",") to split the data into single parts. The final part was to pull out each part of data as required, the departure time, station, platform and train status, final the espeak.synth was used to read out the data. The Project is being tested now (October 2014)
The Glove now speaks and gives the wearer instructions and responds to your inputs. The train data is downloaded and stored in a CSV file but needs a little tidying up before it is usable. This is achieved by opening the file with, open("traintimes.csv") and then create a variable for example data = read_file.read(). I then created a list to store the train data and used train_time_list.split(",") to split the data into single parts. The final part was to pull out each part of data as required, the departure time, station, platform and train status, final the espeak.synth was used to read out the data. The Project is being tested now (October 2014)
|
UPDATE 10 24.9.2014: The Project That Speaks.
The Social Media Glove will not have a screen, yet, and therefore the user will not be able to see the prompts and instructions that the software displays and returns to the console window. However, you can attach headphones which logically leads to a solution that will read out the instructions. This can be achieved through a text to speech library. There are several Python based Speech to Text imports but thanks to @DIYProjectLog and @hippyjim for their espeak recommendation. Easy to install and easy to return a basic robotic voice, (well daft punk make money from robotic voices!). Python also supports espeak use, simply add the line, from espeak import espeak and the a then use the code, espeak.synth("Input your message here") , save and run the program, you have a text to speech solution, be it all rather very robotic!. |
UPDATE 9 23.9.2014: The Final Button
The Glove system now has the capability to take a photo, tweet it and randomly play a selection of MP3s. When thinking of the functionality of the final button it had to be something that people do all the time that takes too many steps to achieve. I was at the train station the other week and that is where I was inspired. We travel to and from the same stations each day especially commuters, we always check the train times via an app or the information boards, this takes time. What if with a single click the times for the next train for your own personal journey were relayed to your ear. This is the concept behind the final button. Basically a Python program pulls down / scrapes the train times from a CSV file stored on Google docs. Then the code opens the file and reads the data to a list which id then prints the times to the IDLE console. More details can be found here |
|
UPDATE 8 16.9.2014: Random Play List
Now that the music player will play an MP3 what about if you don't like the song and want to change it? The user needs to be able to select a different track. I created a simple list of MP3s and then used random.choice(list of songs) to select a random MP3 from the list. This is then combined with the code that plays the MP3 to enable a random MP3 to play when the button is pressed. The user can then select a new song by pressing the button again. A example of the code is shown below. import random import time songs = ["eggs", "bacon", "cheese", "toast", "chips", "hashbrown", "mushrooms"] while True: print (random.choice(songs)) time.sleep(1) |
|
|
UPDATE 7 10.9.2014
Single Button Touch MP3 player I have been canvassing people about what features they want on a Social Media Glove, there seems to be a lot of love for the ability to be able to play music from the touch of a button instead of having to take out a phone, unlock it, find a track, press play…. and so on. There are several MP3 players, to keep things simple I have chosen mp3123, sudo apt-get install mpg321 downloads and installs the required files. Then transfer over an MP3 file to the Pi and use the simple code to stop and start the song when GPIO pin 17 is pressed. There, you have music at the touch of a glove! |
A very simple code to play the song for 5 seconds
import os os.system('mpg321 foo.mp3 &') time.sleep(5) os.system(‘sudo killall mpg321’) |
UPDATE 6: 8.9.2014
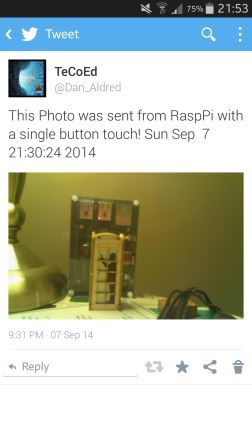
Taking a Picture with Button 1 and Tweeting it with Button 2, At 9:30pm I started the current program build running and pressed button 1, the Pi Camera fired up and took a picture. I pressed Button 2 and the picture was sent to Twitter. The only changes required were to ensure that the picture size was within permitted Twitter upload size. Also the Raspberry Pi date/time was also set as it was totally incorrect! This was done with sudo date 090721302014 |
|
UPDATE 5: Tweeting a Picture 7.9.2014
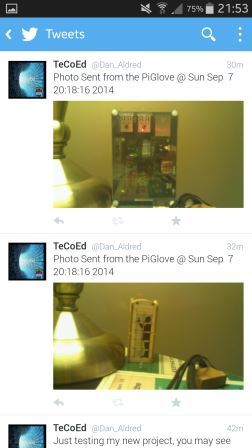
This part of the project involved creating and testing the Python code to enable a picture to be sent from the Raspberry Pi to a Twitter account. There are several Twitter Python APIs available to do this. I used Tweepy as in was already installed. Firstly I updated Tweepy with sudo pip install tweepy --upgrade, this added the ability to send media to Twitter. Next I created a picture called test that was saved into the Pi Home folder. The Python code used is very simple, the fist line stores the location of the picture in a variable called 'picture', the second line is the message that is being sent. The magic happens in the third line where the picture and text are combined and sent using the code api.update_with_media. (The program requires the Twitter user keys, full instructions here) picture = '/home/pi/test.jpg' text = "This is sent from the Raspberry Pi with Python" api.update_with_media(picture, text) print "Tweet Posted" |
|
UPDATE 4: Working Camera 6.9.2014
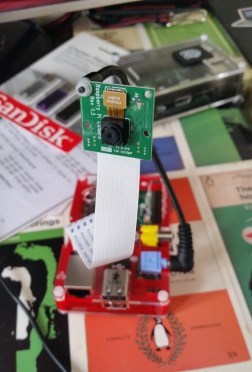
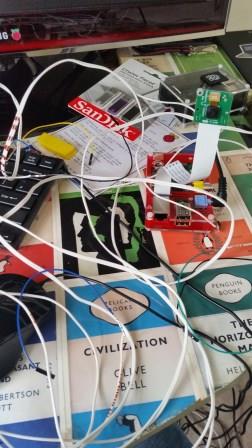
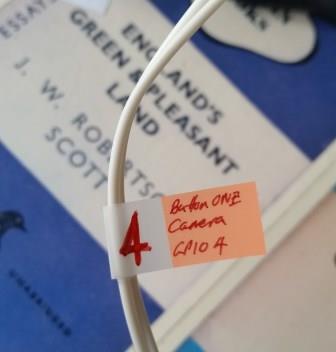
Combing the Raspberry Pi camera and a simple Python code means I now have a functioning button that when pressed takes a picture and stores it in the Pi home folder. The wires were getting very messy and as functionality is added to each button then the wires needed an identification system. I labelled them up with the function, the GPIO pin number and the button number. In the long run this will make it easier when creating the final Glove. Next to Tweet a picture. |
UPDATE 3: Buttons Working 5.9.2014
Thanks to @gbaman1 and the pull up resistor hint the buttons are responsive and natural. I reduced the delay time between the button being pressed and the output message displayed on the screen and it now works very well. At this point the messages are just to test that the outputs are functioning correctly, I do not own laser guided sharks! Next stage is to add the camera function to the button. |
UPDATE 2:Nearly Working 3.9.2014
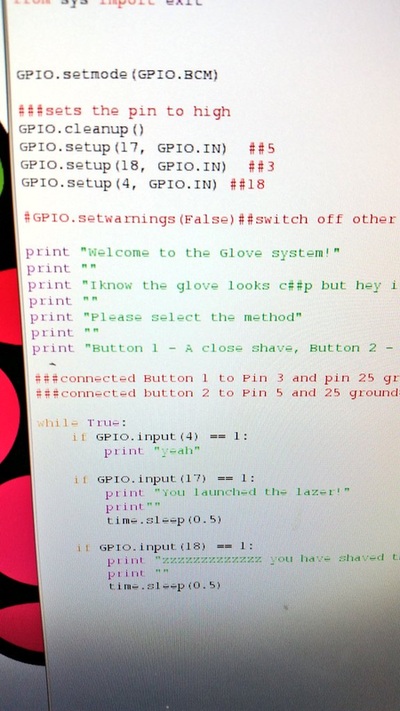
The code is working but, the 3rd button prompt keeps running in a loop even when the button is not pressed. This is a problem as the buttons are over responsive and do not responded in a natural way. This may have been related to the use of the GPIO.BCM vs the GPIO.BOARD layout. However, several tests proved this had no impact. Luckily @gbaman1 was on hand to support and pointed out that the GPIO pins require a PULL UP RESISTOR, this is enabled by using the simple code, GPIO.setup(18. GPIP.IN, GPIO.PUD_UP). Success! Now there are four fully functioning buttons.
The code is working but, the 3rd button prompt keeps running in a loop even when the button is not pressed. This is a problem as the buttons are over responsive and do not responded in a natural way. This may have been related to the use of the GPIO.BCM vs the GPIO.BOARD layout. However, several tests proved this had no impact. Luckily @gbaman1 was on hand to support and pointed out that the GPIO pins require a PULL UP RESISTOR, this is enabled by using the simple code, GPIO.setup(18. GPIP.IN, GPIO.PUD_UP). Success! Now there are four fully functioning buttons.
UPDATE 1:Beginnings: 1.9.2014
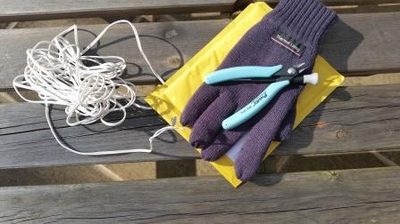
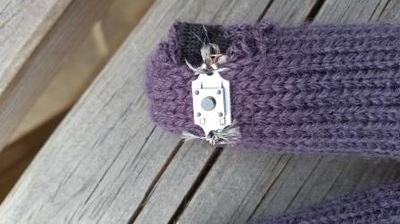
Concept: Create a ‘wearable tech’ glove than enables the user to interact with social media. Using your fingers you can take a picture, tweet the picture, email the picture and even broadcast a message over a Radio (this is more for fun!). The glove will be mobile with a 4 -6 hour battery life. Finally, as there will be no GUI the system will update the user via voice feedback. The starting point of the project is to combine the buttons with the GPIO pins, contact the wires and code a ‘test’ response to the user pressing the button, here we go!
Concept: Create a ‘wearable tech’ glove than enables the user to interact with social media. Using your fingers you can take a picture, tweet the picture, email the picture and even broadcast a message over a Radio (this is more for fun!). The glove will be mobile with a 4 -6 hour battery life. Finally, as there will be no GUI the system will update the user via voice feedback. The starting point of the project is to combine the buttons with the GPIO pins, contact the wires and code a ‘test’ response to the user pressing the button, here we go!
