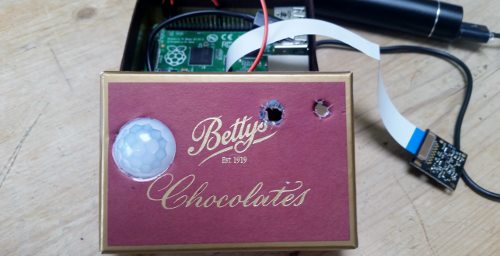
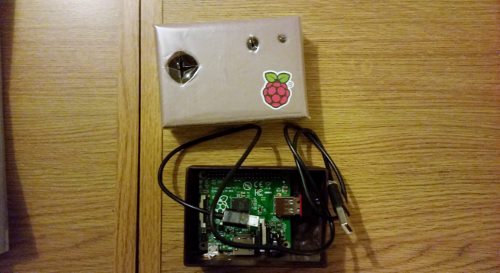
What is it?Remember the photograph of the weasel hitching a ride on a woodpecker? Now you can capture your own action packed wildlife snaps. Create a small, portable box with a sensor that can be deployed anywhere and will detect wildlife and other small animals. When the sensor is triggered the camera takes a picture, stores it and then Tweets it @PiTest. Your own personal Nature Box for less than £50. See the Live photos as they come in, follow @PiTests
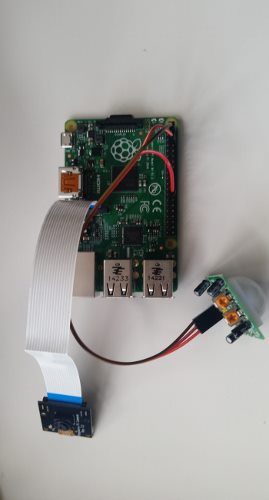
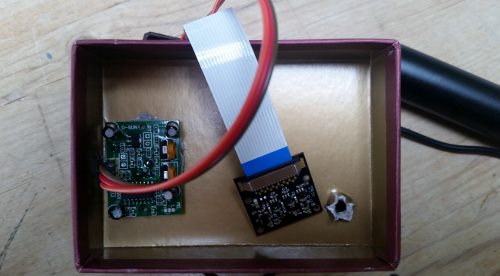
1. What you will need to get started.There are a number of components that you will need in order to make the Nature Box. You will need a PIR sensor, a Pi Camera, a WiFi dongle, a Portable Battery and some sort of water proof box to house the hardware – make sure it is water proof other wise if it rains it will damage your Pi.
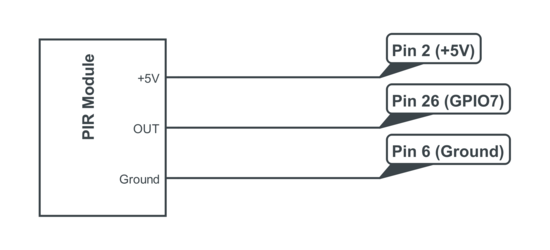
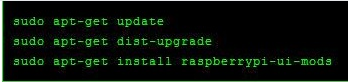
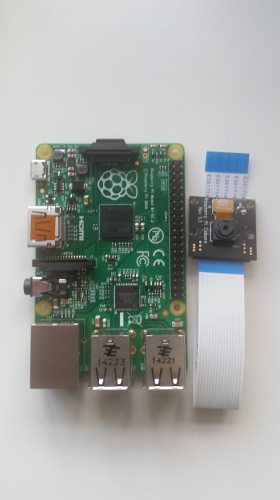
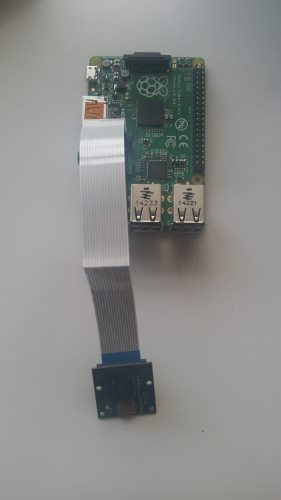
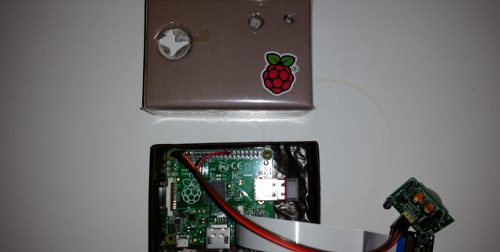
Connect the Camera the PiCamera to the Raspberry Pi, ensure that it is round the correct way and that the contacts are touching. Remember to enable the Camera using sudo raspi-config. Next connect the PIR, just follow the simple diagram below. The PINS stated here are the physical pin numbers on the Raspberry Pi not the GPIO numbers. The +5V pin on the PIR connects to PIN 2 on the GPIO board, the OUT connects to PIN 26 and the Ground connects to PIN 6. It is also advisable at this point to update your Raspberry Pi, see picture two below. 2. Testing the PIRThe simple code below will allow you to test that the sensor if working correctly. Open Python and copy over the code, save and run, you should get a print out to the console saying "We see you", each time the PIR is triggered.
import time import RPi.GPIO as GPIO GPIO.setmode(GPIO.BCM) PIR = 7 GPIO.setup(PIR, GPIO.IN) print "Ready to find you" time.sleep(2) def Motion_Sensing(PIR): print "We see you" try: GPIO.add_event_detect(PIR, GPIO.RISING, callback=Motion_Sensing) while 1: time.sleep(100) except KeyboardInterrupt: print "Quit" GPIO.cleanup() 3. Setting up the CameraIf you have updated your Raspberry Pi software then the Pi Camera software will already be installed and you will be ready to test your camera. Taking a picture with Python is very simple and can be achieved in a few lines of code.
import time import picamera def nature_selfie(): with picamera.PiCamera() as camera: time.sleep(0.5) camera.capture('nature.jpg') nature_selfie() The picture that is taken will be stored and sent to Twitter so there is no requirement to preview the picture. To save it, use camera.capture('nature.jpg'), where nature is replaced with the name you wish to call the image file. To ensure the files are not over-written create a variable called File-Number, which is incremented after each photo is taken, so each file is called, NB1, NB2, NB3 NB4 and so on. camera.capture("Nature" + str(File_Number) + ".jpg") File_Number = File_Number + 1 Combing the PIR and Camera code is the basic set up for Nature_Box. Each time the PIR sensor is triggered the Camera is activated and takes a photo, the file is saved. A test version is available for download below.
|
In Action4. Adding TwitterIn order the send the photos of the animals, birds, giraffes via Twitter you will need to set up the Twitter API codes and then install Tweepy. If you already have codes then you can skip this part if not, then follow this link and it will walk you through the steps required.
To send media over Twitter from the Raspberry Pi you require the most up to date version of Tweepy, however, there are some issues in installing this, however this method is tried and tested. In the LX Terminal type: sudo apt-get install python-pip python-dev sudo pip install -U pip then install Tweepy with: sudo pip install tweepy Once your Twitter account is set up then create a function to attach the photograph and tweet it. Where newpic is the file name of the photo. You can customise the text in line 4 to a message of your choice, then use api.update_with_media(photo_path, text) to combine the text and the photograph, before it is tweeted. def tweet_the_picture(): api = tweepy.API(auth) photo_path = "/home/pi/newpic.jpg" text = "Test Picture " + time_of_tweet api.update_with_media(photo_path, text) tweet_the_picture() 5. Setting up the Wi-FiIf your WiFi keeps cutting out then disable the power management
6. Automatic Start upWrite down where you have saved the Nature Box program, for example in the “/home/pi/” and called final.py therefore use /home/pi/final.py. You can double check you’ve got the correct path by typing :
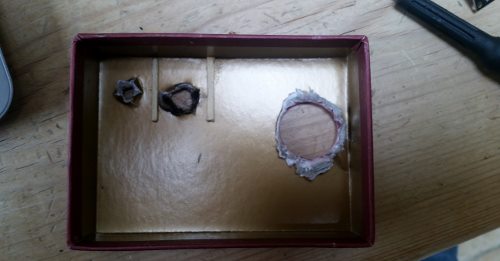
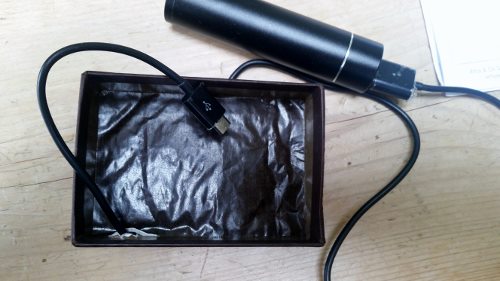
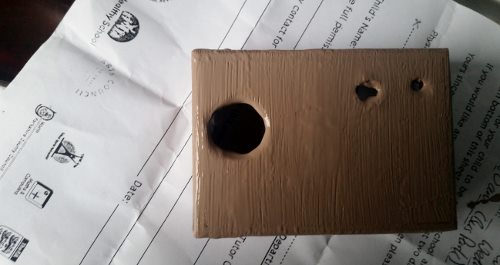
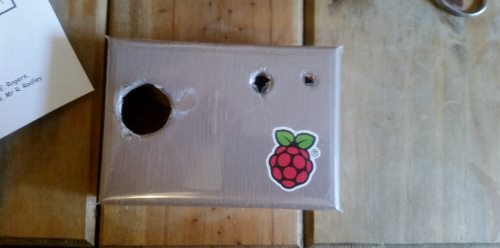
sudo cat /home/pi/name_of_your_script.py If correct, this will display contents of your Python code. The next step is to create a Cron job by modifying the “crontab”. To edit it type sudo crontab –e (this will run the Cron task for all users) Scroll to the bottom of the window and add the following line, @reboot python /home/pi/name_of_your_program.py & (The “&” at the end, will run the code in the background and your Raspberry Pi will boot up as normal. ) Save the file using “CTRL-X”, then select “Y” and reboot. 7. Creating the BoxDownload the Final Code
| ||
- Home
- Python
- Ras Pi
-
Pi Hardware
- Pi-Hacks
-
Pi-Hacks 2
- The Joker
- Hologram Machine
- Google Vision: Camera Tell
- Yoda Tweets
- Pi Phone
- Darth Beats
- Twitter Keyword Finder
- Crimbo Lights Hack
- Xmas Elf
- Halloween 2016
- Halloween Hack 2015
- Socrative Zombie
- Voice Translation
- The Blue-Who Finder
- GPIO, Twitter
- Pi Chat Bot >
- PiGlow & Email
- Pibrella Alarm System
- SMS with Python >
- Pi-Hacks 3
- Minecraft
- Computing
- Contact Me
- Random Hacks