What is it?The folks at ENERGENIE have created sockets or plugs which can be turned on and off via the Raspberry Pi. You can buy a starter kit here which includes the RF transmitter add-on board and two sockets to get your started.

Once installed and set up your Raspberry Pi can be used with the R-PI to control up to 4 simple Energenie radio controlled sockets independently using a small software program. The add-on board connects directly to the he GPIO which can be controlled as either input or output lines under your software control. A Python library is also available to program the sockets.
|
Turn a light on / Turn a light off |
|
|
|
1. Getting StartedTo get started boot the Raspberry Pi up and load the LX Terminal and update:
sudo apt-get update sudo apt-get install python-rpi.gpio Then reboot the Pi and this will install the Python GPIO libraries meaning you can access and control the pins via Python code. Next install the Python Libraries, in the LX Terminal, depending on which version of Python you are using type:
In the future you may need to update the software use this code:
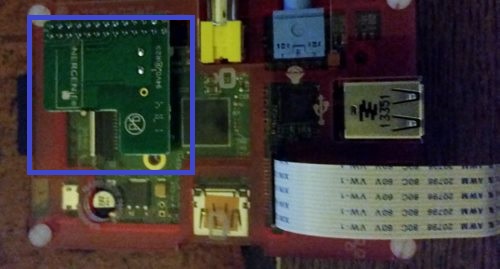
sudo pip install energenie –update 2. Fitting the TransmitterTurn the Raspberry Pi off, sudo halt, and fit the Raspberry Pi transmitter board. It fits nicely onto the GPIO pins. Power up the Pi and get your ENERGENIE plug sockets ready. Plug the first socket into the wall. Before it can be used it must be programmed to learn a control code from the transmitter.
To do this the socket must be in learning mode indicated by the lamp on the front of the socket housing flashing slowly. If it is not doing this, press and hold the green button on the from of the housing (while the lamp is off), for 5 seconds or more and then release it when the lamp starts to flash at 1 second intervals.
Download the above program which will search for and setup the communication between the socket and the Pi. Run the program and it will send a signal out, follow the onscreen prompts by hitting the return key.
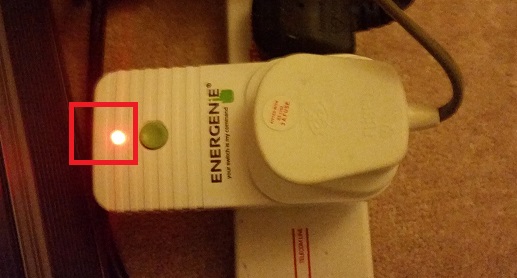
If the acceptance is successful it will be indicated by a brief quick flashing of the lamp on the housing which will then stop. Program first one socket then the other in this way, otherwise they will react to the same signal.
|
3. The Python CodeThe Python Code is very simple to use and you will soon be using your Raspberry Pi to turn the kettle on or off or flash a light on or off. Firstly ensure that you have set up the power socket using the 'set up program' then start a new code window.
Use the code to turn the socket on: energenie.switch_on(1) To turn off the socket off use the cod : energenie.switch_off(1) The simple program below asks the user if they want to turn the light on, if you respond with 'no' then the light stays off. If you type yes then the light turns on for 10 seconds before switching off. (The full code is below the video) #import the required modules
import RPi.GPIO as GPIO import time import energenie from energenie import switch_on from energenie import switch_off energenie.switch_off(1) print "WELCOME TO THE HACKING LAMPS" print " " time.sleep(2) try: while True: choice = raw_input("Would you like to turn the lights on? ").lower() print " " if choice == "yes": energenie.switch_on(1) print "The light is ON!" print " " time.sleep(10) print "Turning Off" time.sleep(1) print "" energenie.switch_off(1) else: print "The light is OFF" # Clean up the GPIOs for next time except KeyboardInterrupt: GPIO.cleanup() | ||||||||
